How to integrate a form on your Framer website

Oct 17, 2024
Framer
Creating a form to collect user data on Framer is straightforward, especially using their native form components. While third-party integrations like Magic Forms offer more advanced options, the majority of the time, Framer’s built-in form builder will be the best solution for your needs.
1. Add a Form
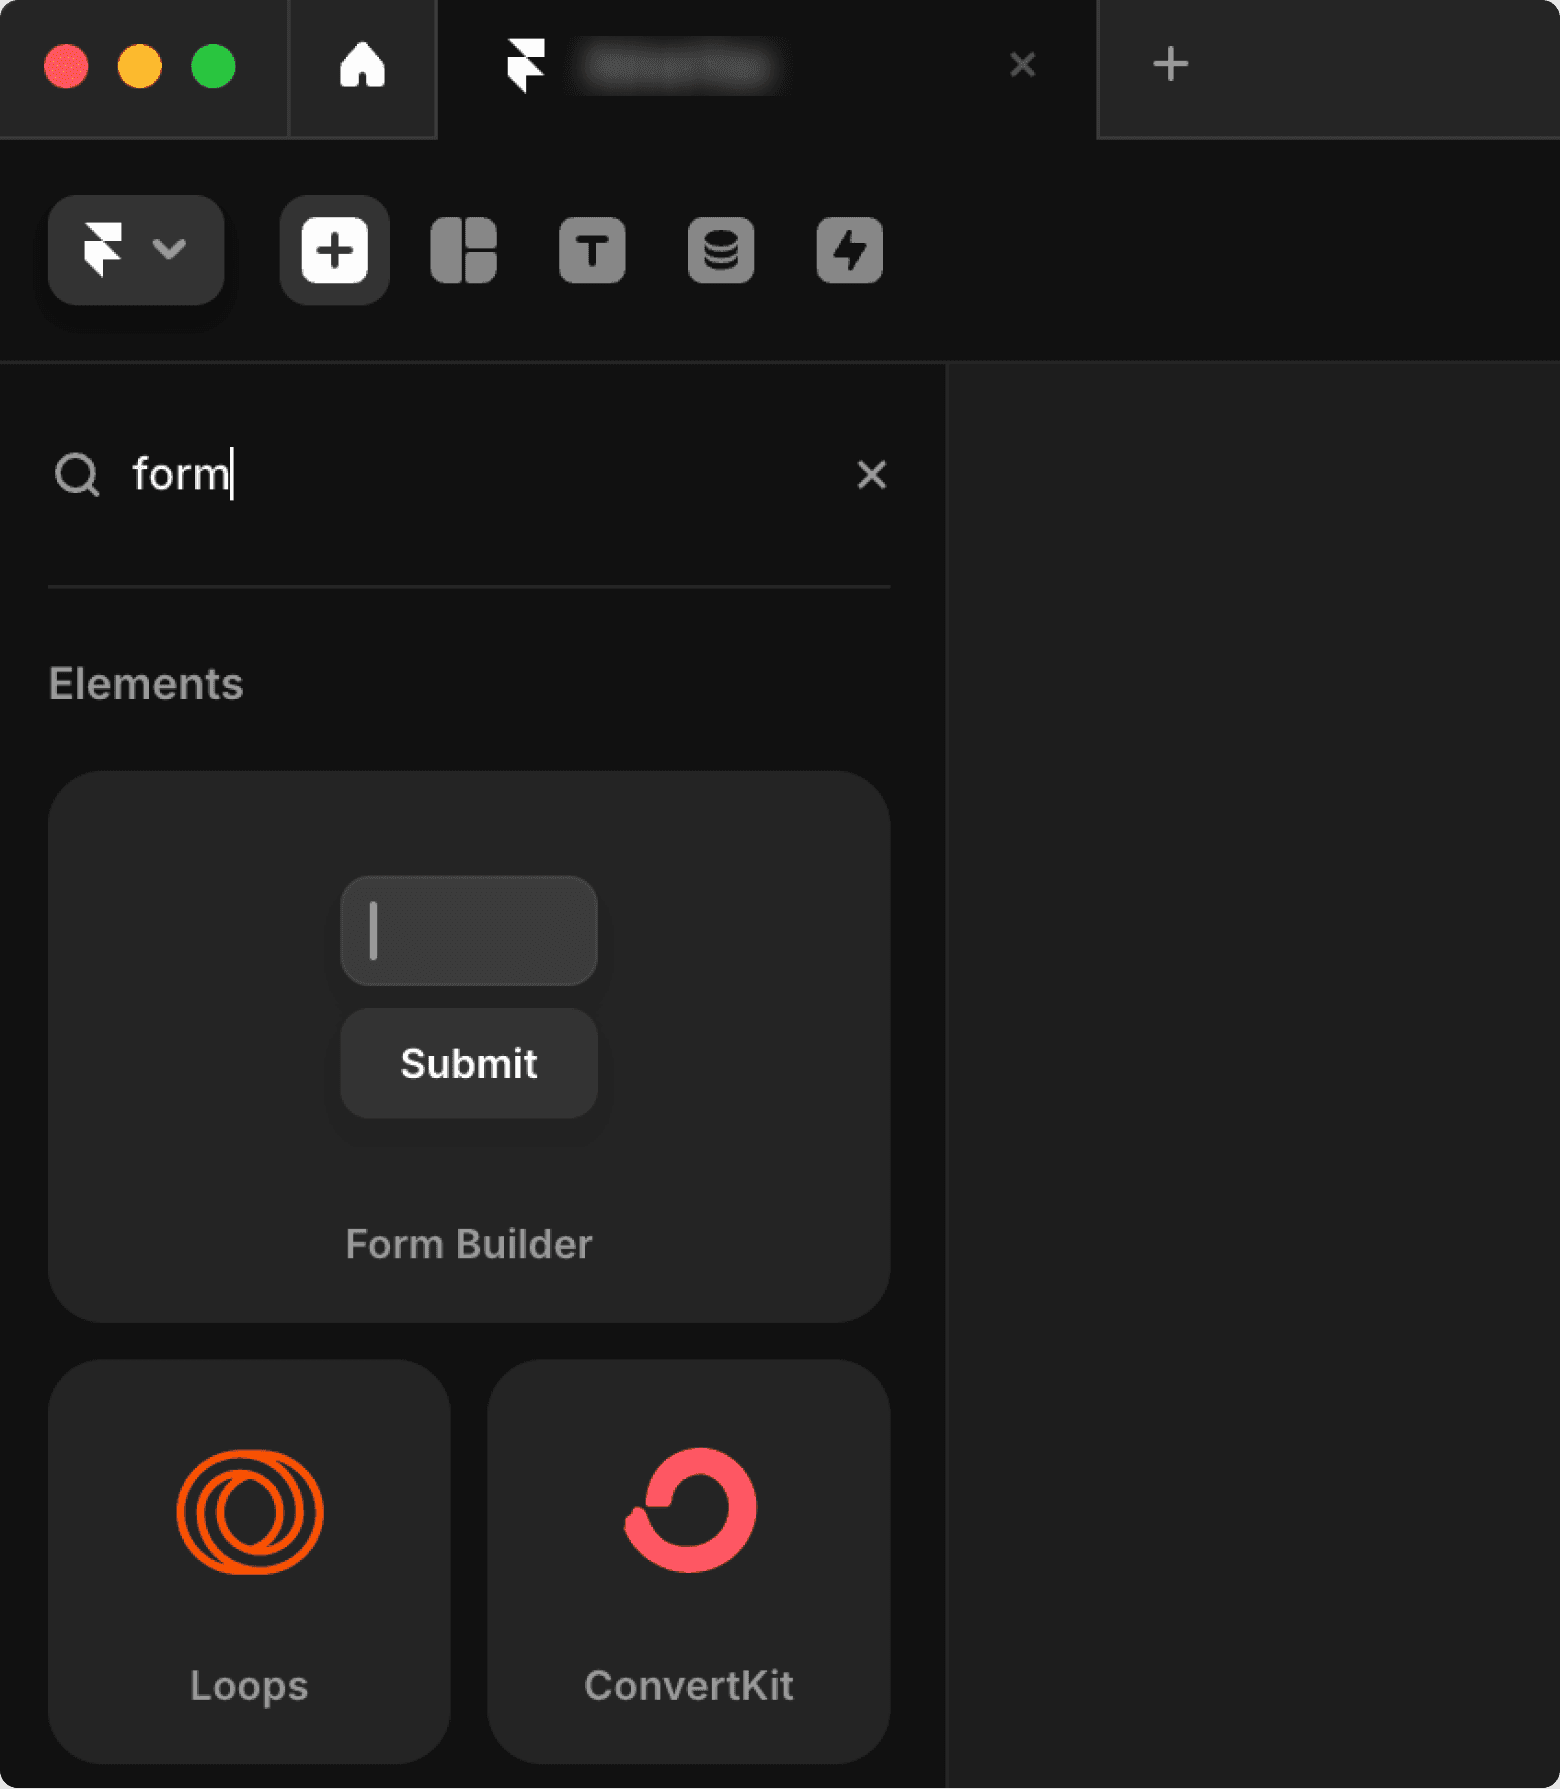
To add a form, click the Insert button at the top (the one with a plus icon) and search for “Form”. You will see several options, including Loops, ConvertKit, and Mailchimp. In this guide, we will focus on the first option, Framer’s Form Builder. However, if you already have an account with one of the other services, you can choose that option—the process is quite similar.
Select and drag the “Form Builder” and place it where you want on the canvas.
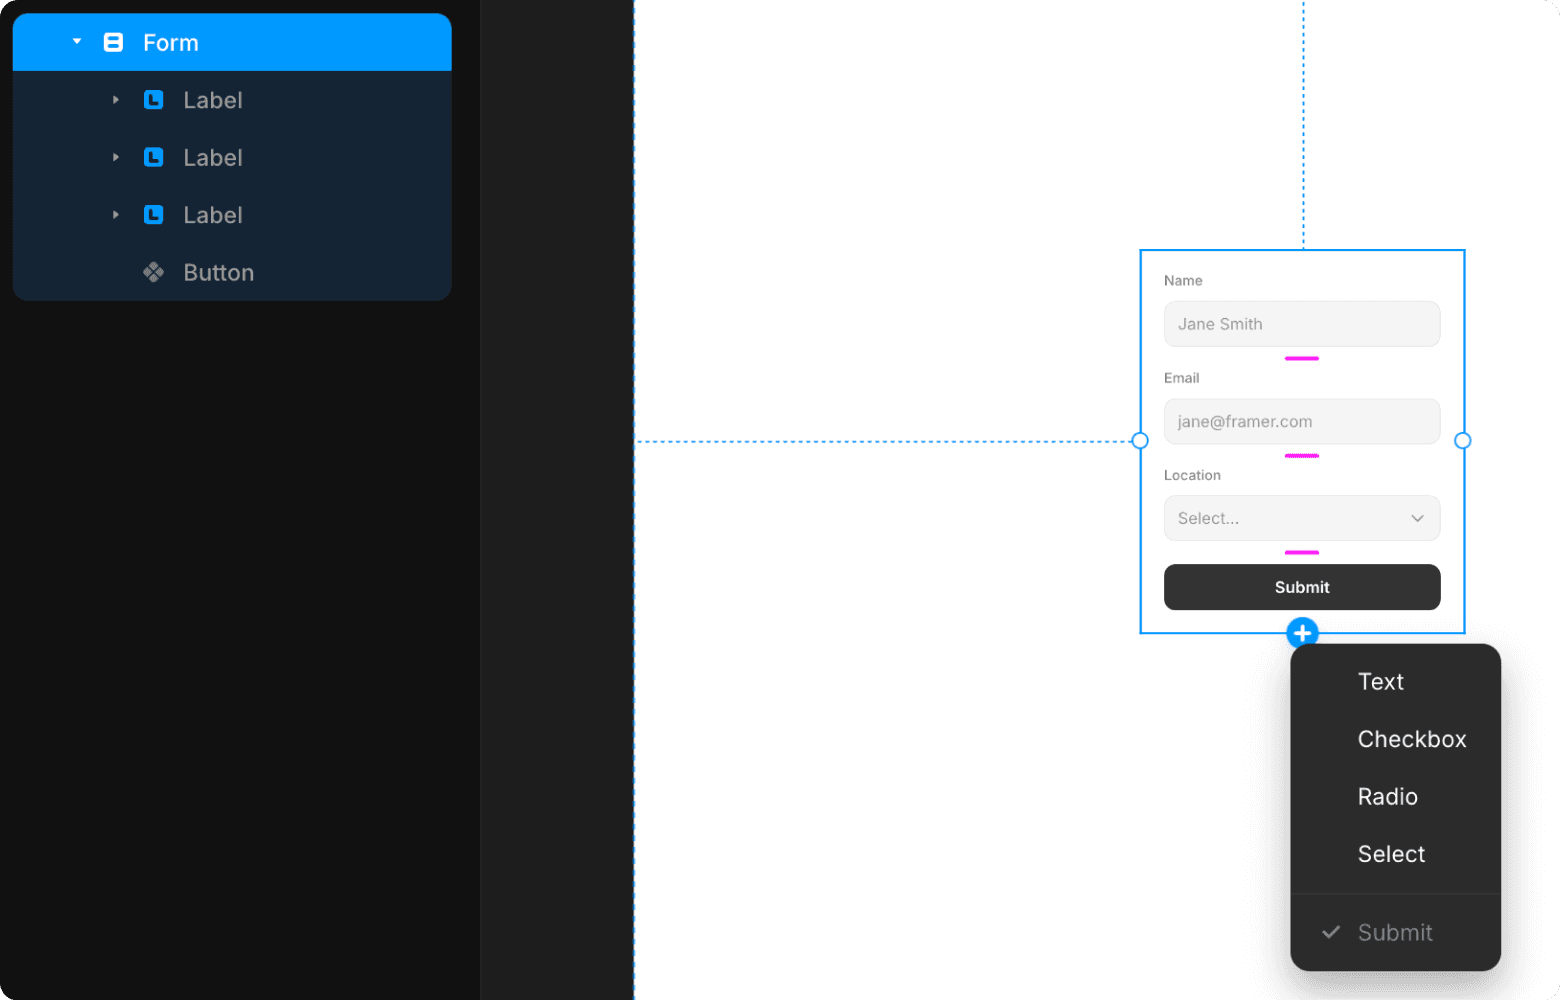
2. Form Structure
The form is fully customisable, but for now, let’s focus on its layer structure.
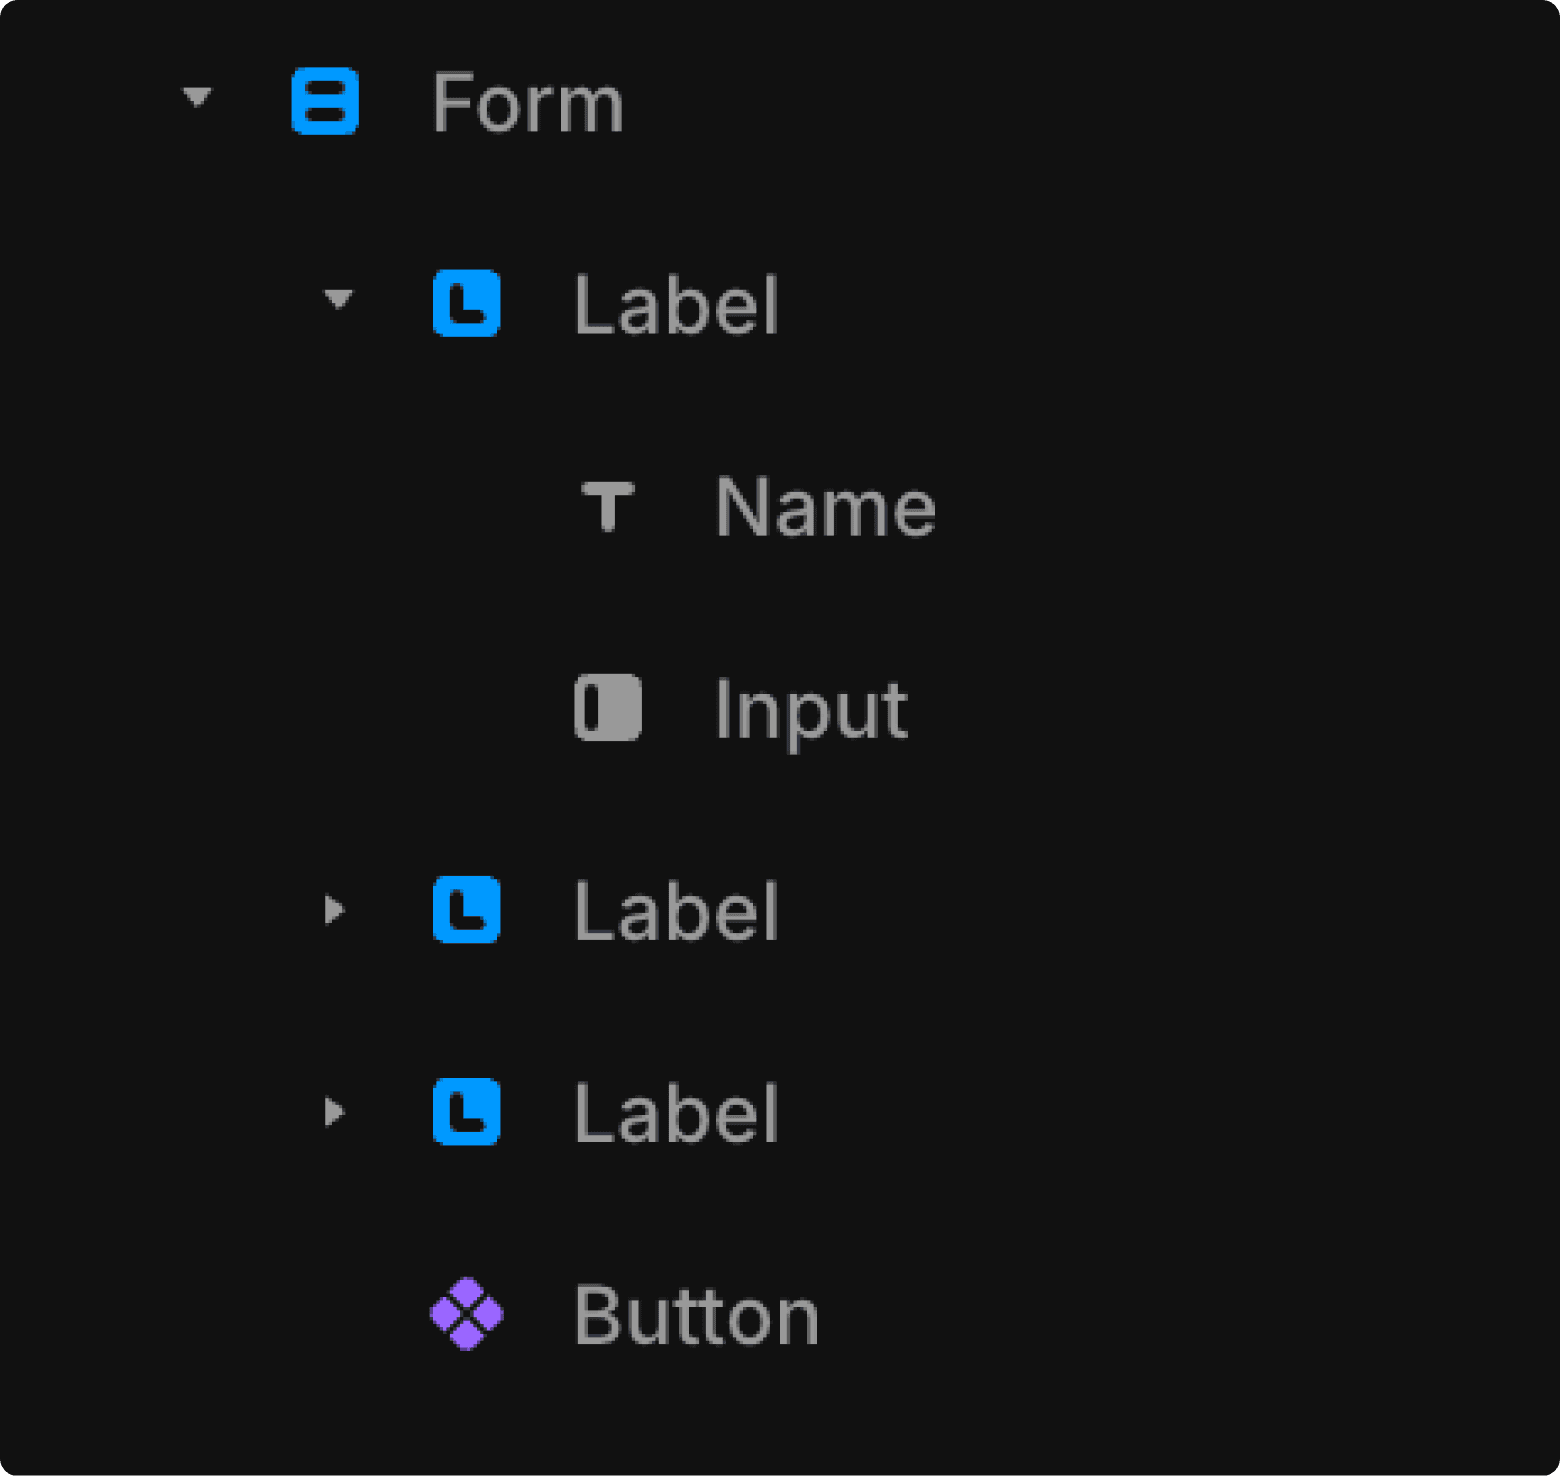
At the top level, you will find a vertically stacked layer called "Form", which functions similarly to any other frame, with some special settings that we’ll cover later.
Within this parent frame, there are a series of “Label” frames, which contain both a text layer and an input layer. While you can delete the text frame, we recommend keeping it for SEO and accessibility reasons. The icon (L) on the frame indicates that the “label” tag has been added for accessibility, which Framer handles for you automatically.
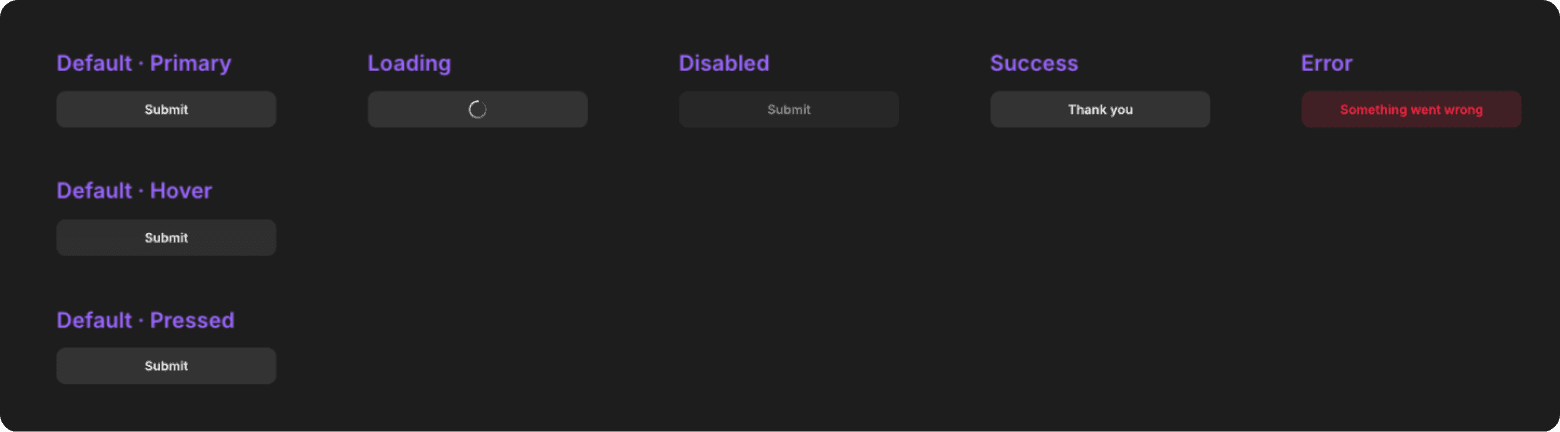
At the bottom of the form, there is a Button component with default states, such as hover, error, success, and disabled. You can easily customise these states to match your design.
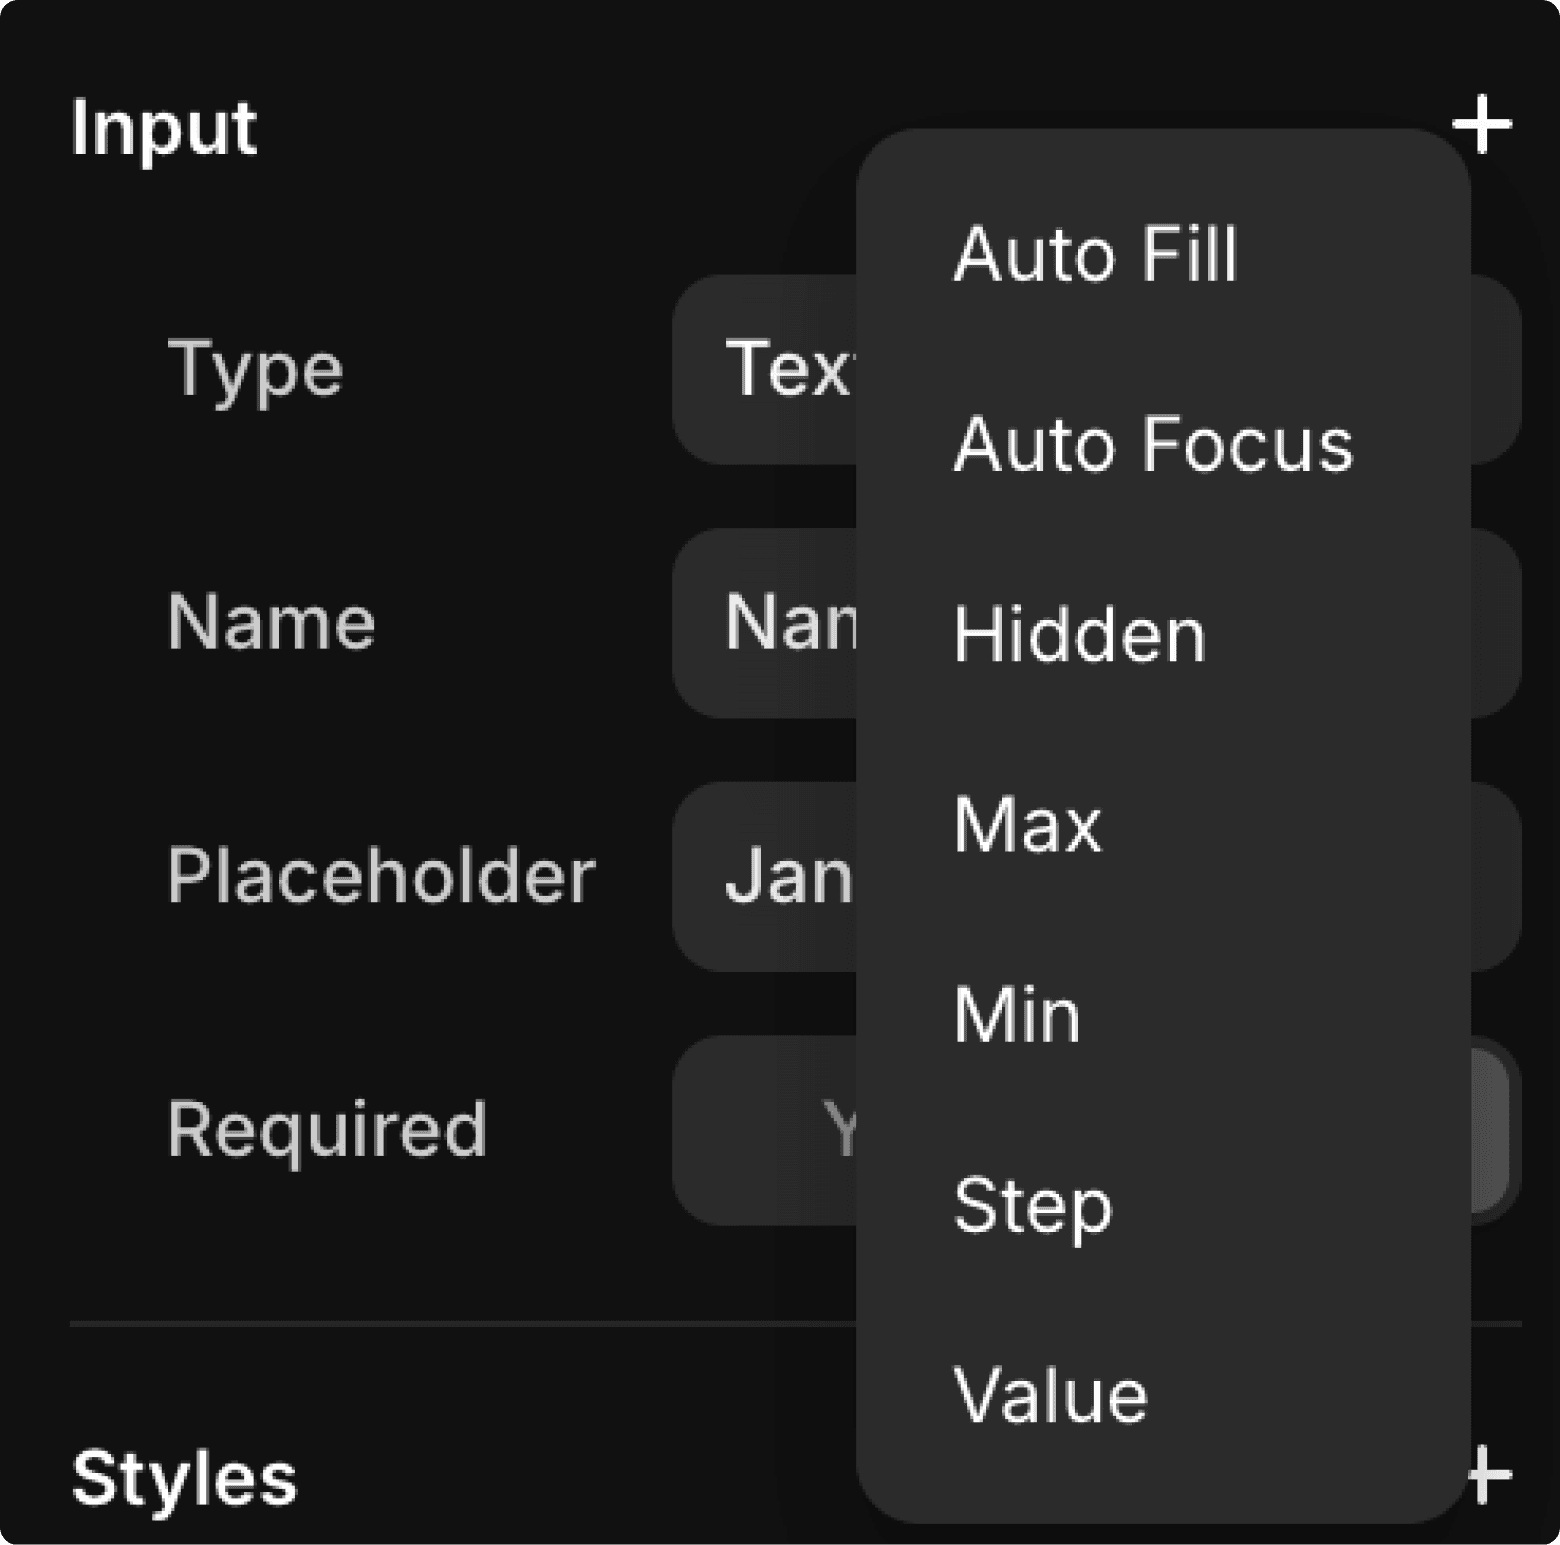
3. Input Categories
Let’s look at customising the form’s input fields. There are four different input categories to choose from:
Text: Standard single-line text input.
Select: A dropdown menu with customisable options.
Checkbox: To toggle one or multiple options on or off.
Radio: To select a single option from a group.
To add an input field, select the "Form" layer, click on the plus icon at the bottom of the component, and choose the category you need from the dropdown menu.
Each category has unique properties, but the setup is similar across them all. Once you’ve configured one input field, the rest will be intuitive.
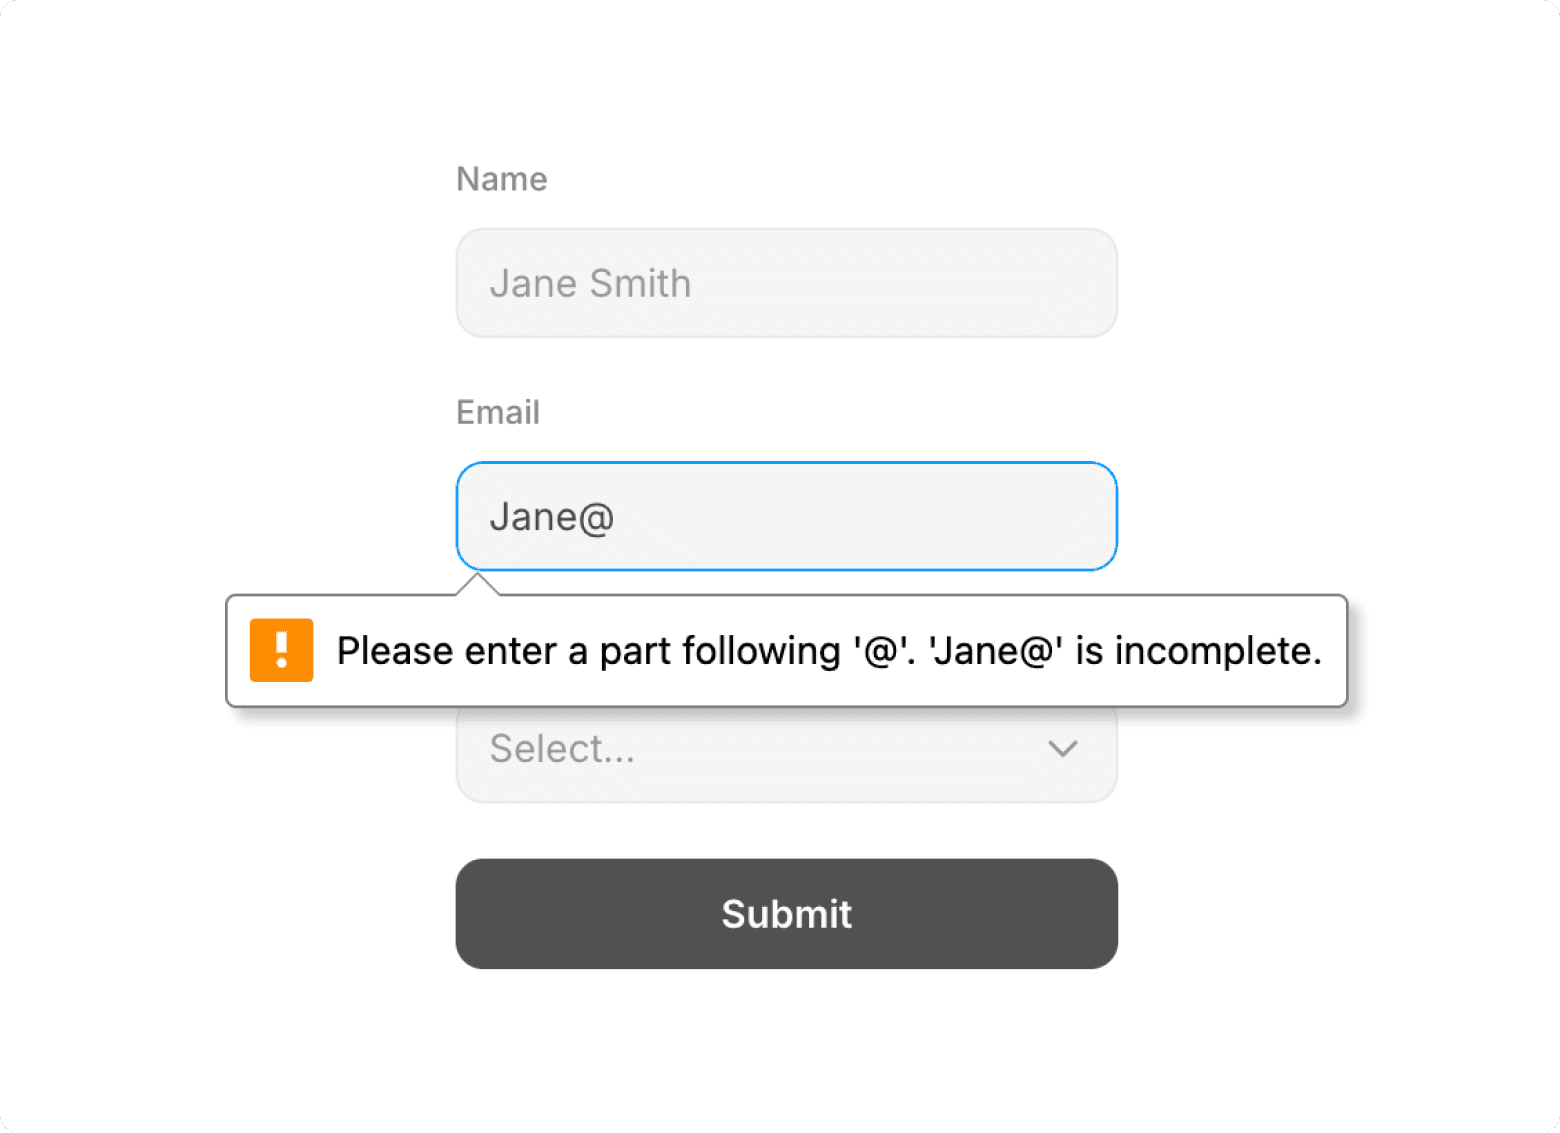
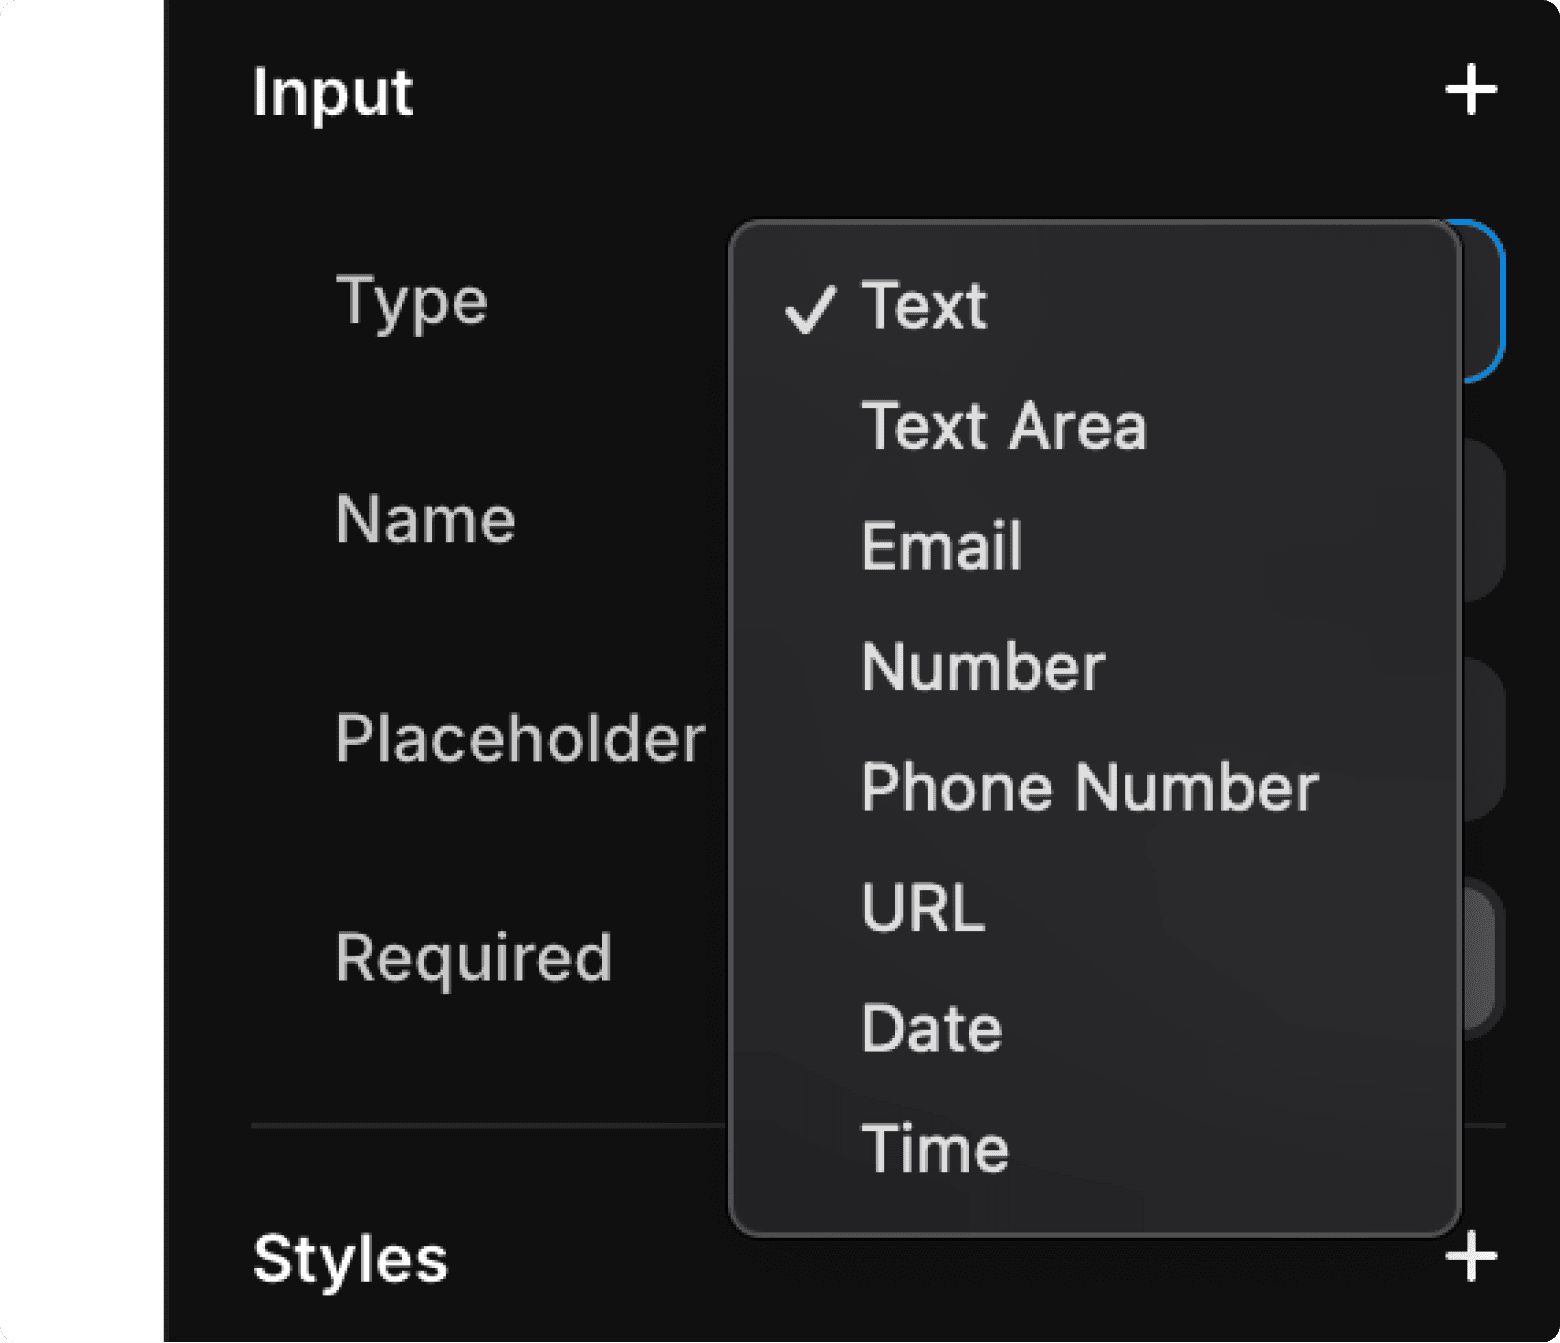
4. Text Input Properties
Let’s focus on the Text Input, as it has additional settings. Framer’s form components include built-in browser validation to ensure users submit correctly formatted data.
You can specify the type of input field by selecting the Text Input type from the properties panel. The options include:
Text: A single line of text.
Text Area: For multi-line text or paragraphs.
Email: Ensures valid email formatting and triggers mobile browsers to adjust the keyboard.
Number: Ensures a numeric input and prompts number keyboards on mobile devices.
Phone Number: Adjusts to a phone keypad on mobile devices for user-friendly input.
URL: Validates proper URL formatting.
Date: Provides the browser’s native date picker.
Time: Displays the browser’s native time picker.
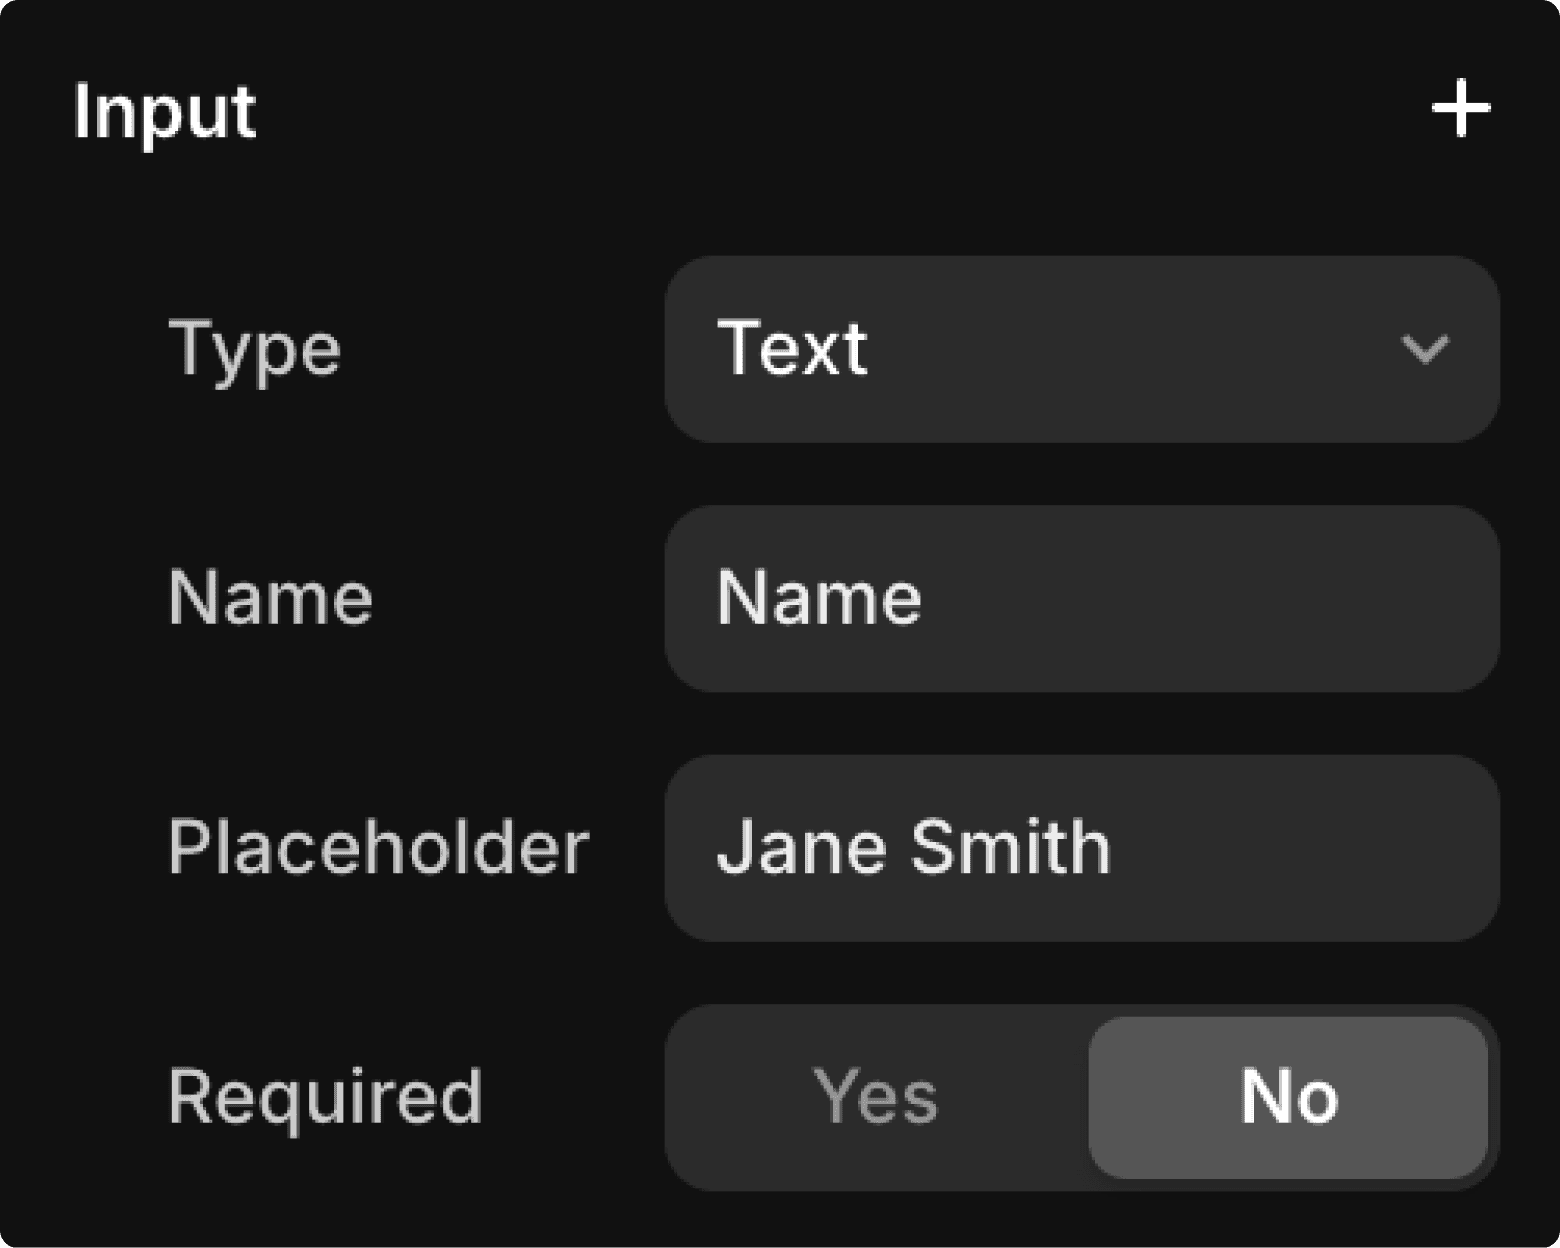
Once you’ve selected the type, you can rename the input field, which will determine how the submitted data is labelled when received. Avoid over-customising the name, as this also helps browsers autofill data for users.
You can also customise the placeholder text, decide if the field is required, and configure additional settings via the plus button in the properties panel.
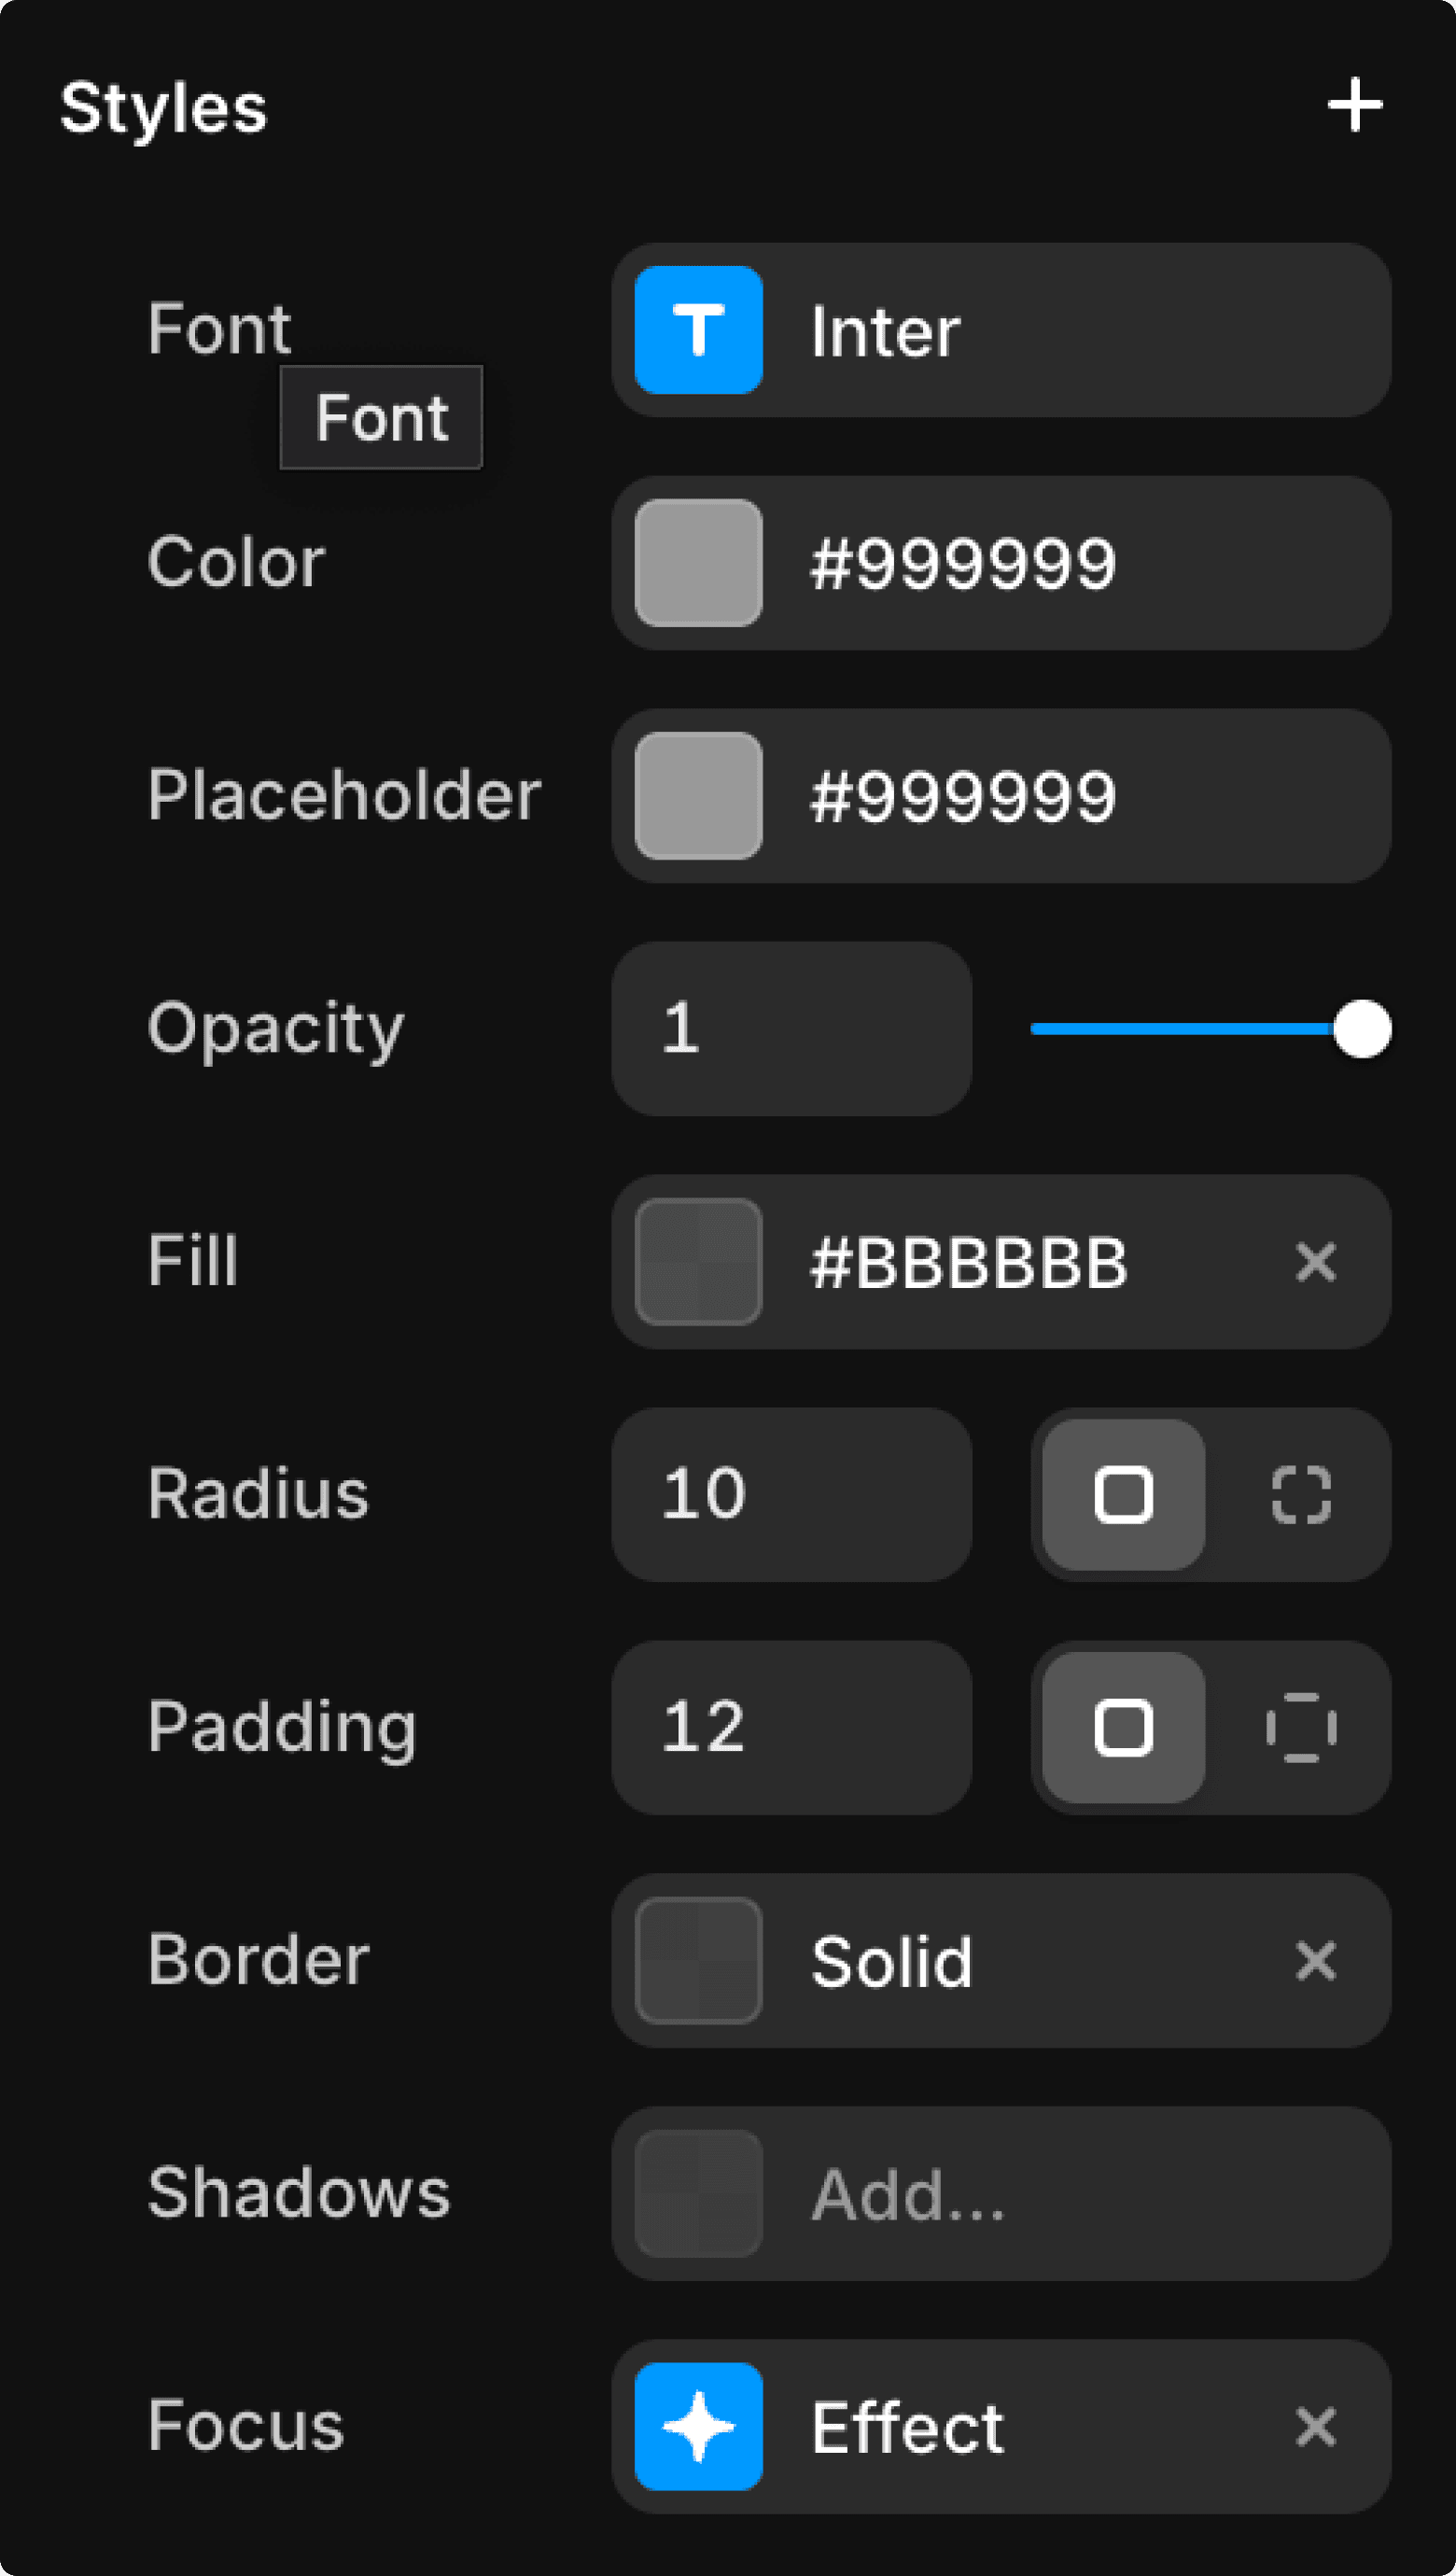
5. Styling
After setting up your input fields, it’s time to style them. Styling inputs in Framer works much like any other frame, with a few key differences:
Colour: Adjusts the text colour the user types.
Placeholder: Sets the placeholder text colour.
Focus State: Alters the appearance of the input field when it’s clicked on by the user.
Spend some time customising the appearance of each input to match your branding or preferences.
6. Submit Button
The final component is the Submit Button. As mentioned earlier, this comes with pre-configured states, but you can always customise it by double-clicking the button to enter component view.
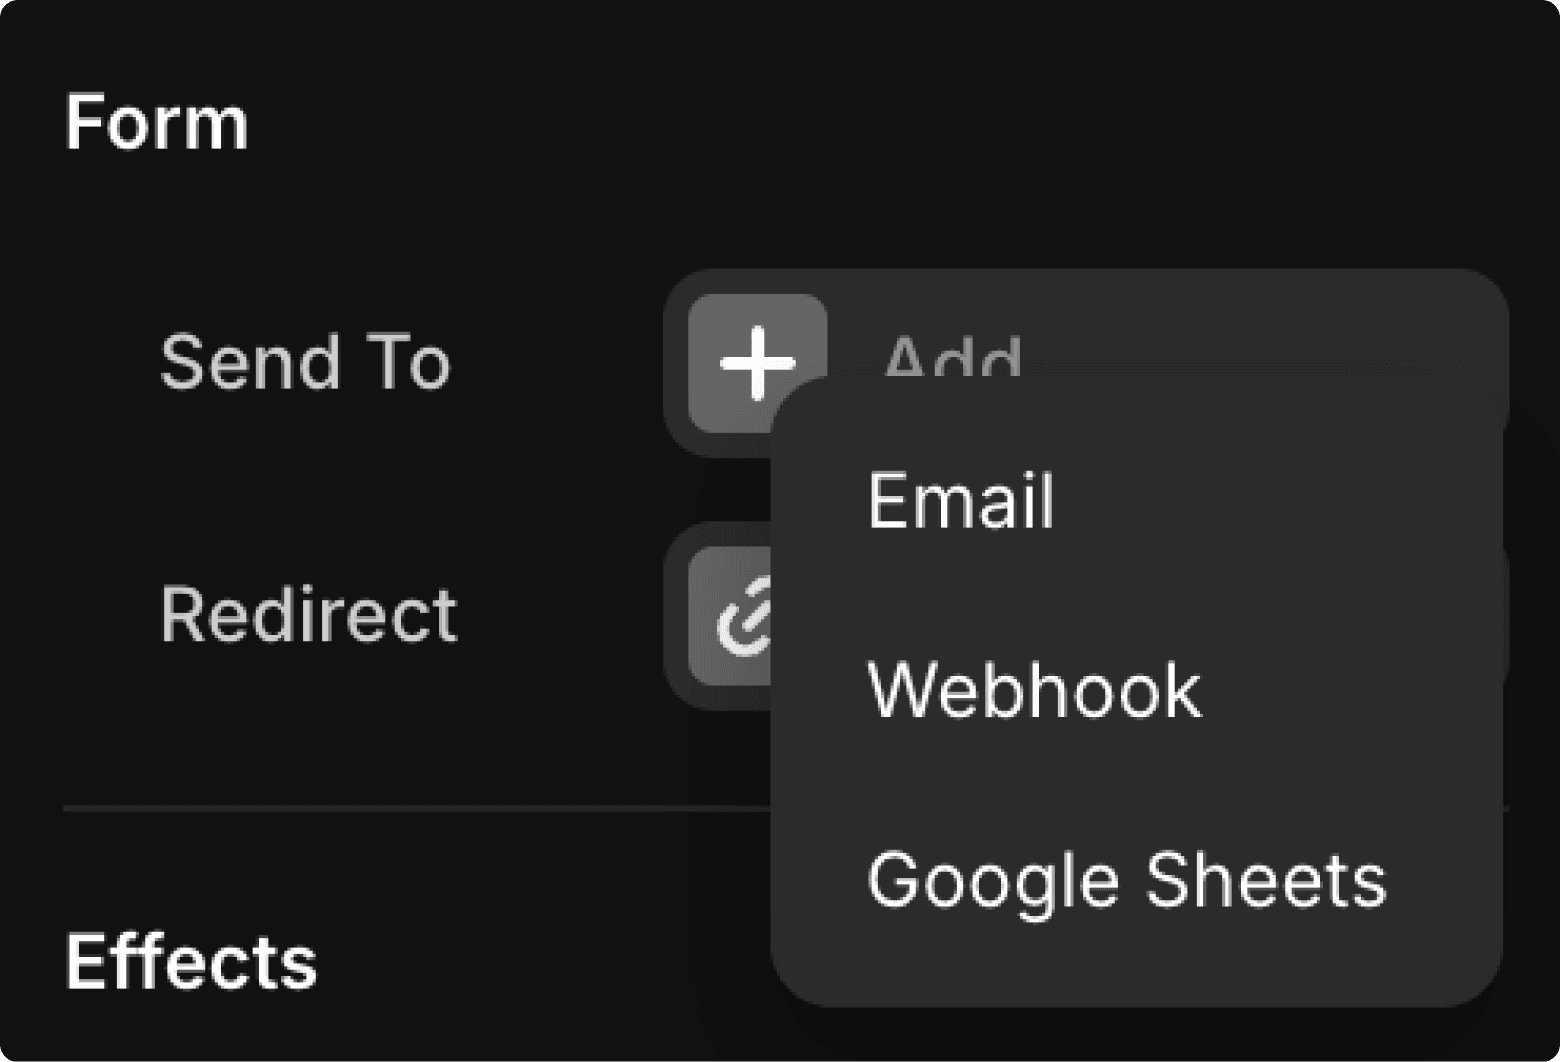
7. Form Submissions
Now we need to decide where the form submissions will go. To set this up, select the parent "Form" layer and head over to the properties panel on the right. You can choose to send the data to one or a combination of the following destinations:
Email: Have submissions sent directly to your inbox.
Webhook: Connect to third-party services.
Google Sheets: Send data straight to a Google Sheet for easy management.
8. Conclusion
Framer's form builder is already highly versatile, with built-in spam protection to guard against unwanted submissions from bots or crawlers. And with continuous updates from Framer, the form integration options are only getting more powerful.
If you're having trouble building a form on your Framer website, or if you'd like some extra guidance, don’t hesitate to reach out.
Each of our templates comes with step-by-step video tutorials, making it simple for you to customise and launch your website with confidence. Whether you need a portfolio, blog, or business site, our templates are designed to be flexible and user-friendly.